

Can't wait for the beautiful Spring days ahead? Re-create a picture perfect day on your fingertips in just five-steps. This cheerful design—which features fluffy clouds and a blazing accent nail—is so easy you can even add the art to your toes. Now that's what we call walking on sunshine!
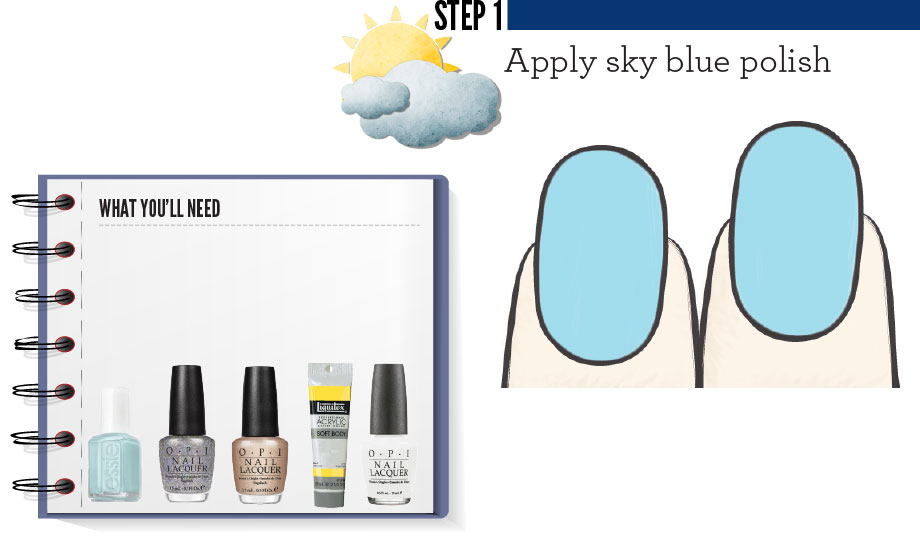
Apply two coats of light blue polish on each finger (Like Essie Nail Polish in Mint Candy Apple).

Define your cloud shapes with an outline of silver lacquer (Like O.P.I Nail Polish in Your Royal Shine-ness). Paint a small silver dot on the outside left corner tip and add two more dots diagonally up to the middle edge of the nail. Leave your thumb blank.

To create fluffy clouds, paint a small dot of white polish inside the silver outline (Like O.P.I Nail Polish in Alpine Snow).
Be sure to leave a silver border which gives your cloud puff a stronger silhouette.
Be sure to leave a silver border which gives your cloud puff a stronger silhouette.

First, paint a half circle on the outside corner tip of your thumb using a gold lacquer (Like O.P.I. Nail Polish in Glitzerland). Then, draw a smaller half circle in a bright yellow hue (we opted for an acrylic paint) inside the curved shape and be sure to leave a thick gold outline.

Dip a tiny paint brush or toothpick into the yellow acrylic paint and create sun rays by adding micro dots that spread outward from the circle. We chose to use three spots for each ray. The biggest dot should be closest to the half circle and the smallest speck should be farthest from the golden shape. If you prefer linear solar rays, you can also draw straight lines jutting out from the half circle.

For a simpler take on the look, create a cloud accent nail on the ring finger and leave the rest of your fingertips light blue. Make your shape pop with a dark blue polish outline (Like Essie Nail Polish in Smooth Sailing).

No comments:
Post a Comment