
Creating makeup effects is similar to baking a cake. There’s a recipe. A method to the madness. An order to do things and a lot of ways to mess it up. Fortunately, everyone has to start somewhere, and practice is part of the fun. As Halloween nears many of you will no doubt start to pull out the biggest and baddest beauty tricks up your sleeves, creating otherworldly creatures or the nastiest of gore right here on earth. Problem is, advanced techniques are hard to come by if your stash isn’t prepared with the basics. We asked makeup artist and special effects instructor Kat Lieberkind to give us her two cents on kit staples for October and year-round.
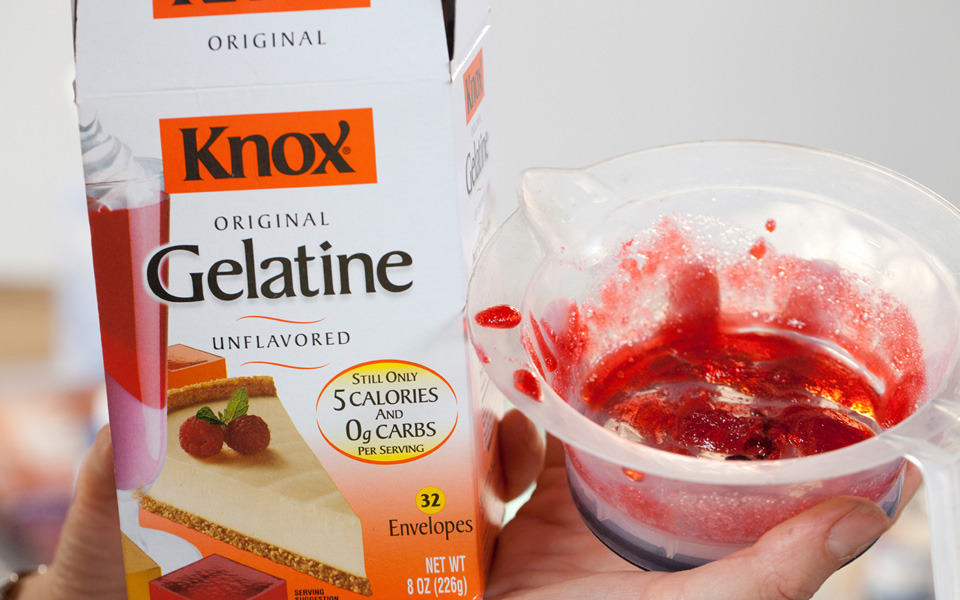
A lot of people take pride in mixing their own blood. You can DIY your own with corn syrup and food coloring. Some fake blood has a little bit of laundry detergent, which comes easier out of the clothing. But never trust it 100% unless you test it first.
Blood usually comes in three colors. If you choose one, pick medium or dark. A light color is more oxygenated and bright. On camera, vivid red looks like ketchup, so some people mix in a little bit of soy sauce to darken it.”
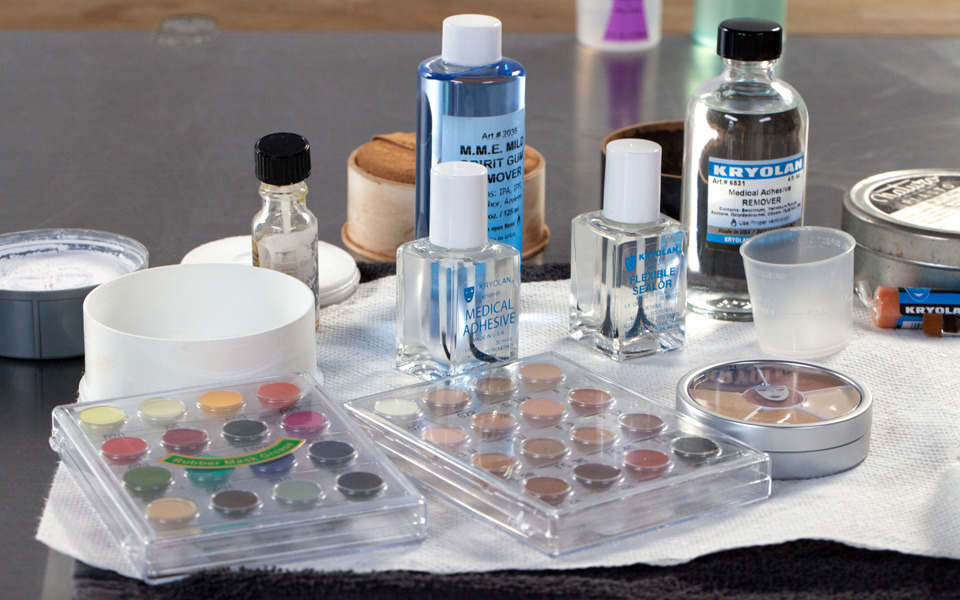
You can block out the brows many ways, and how much wax you use depends on the amount of hair already on the brow. You want the hair to adhere to the skin as flat as possible. I prefer to do this with spirit gum though, because it comes out of the hair easily and it’s pretty strong. But if you need the look of skin with no hair, then fill those tiny cracks in with wax afterwards to smooth things out. Then, go over it and dab a sponge to create a texture on the skin—it's not plastic smooth. To put makeup on it, you have to seal it with a special sealer, because anything you stick onto the face you have to seal before applying makeup.”
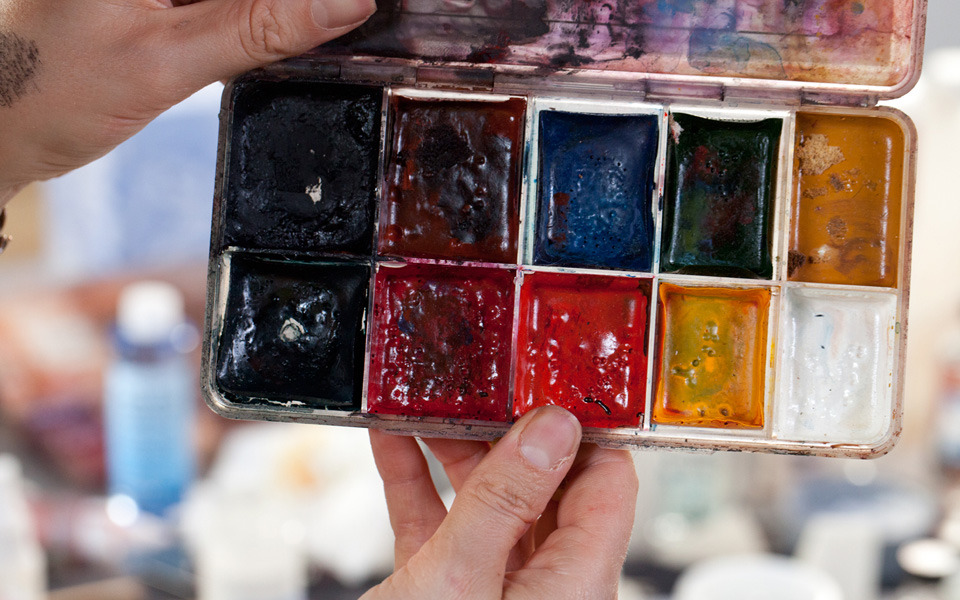
Because I work on movies and we shoot the same scene all day, you can’t have a bruise suddenly darker than before, so I use the most durable color out there. Regular makeup—cream colors and foundation—can only be use on effect that don't include latex or rubber. For those, you should use rubber mask grease paint or alcohol-based paints. It’s like a watercolor palette but activated by 99% alcohol instead. Once you put it on it stays really well and comes off with alcohol. It’s like a marker on the skin. But if you’re doing a bruise for a photo or for fun, I have great results with cream colors or powder eye shadows. If durability is not an issue, you might as well just use some purple eye shadow. You don’t want it to look too painted on, it should look like it lives underneath the skin. Make the bruising look more real by powdering with a setting powder that matches your skin tone. ”
ARTIFICIAL BLOOD
“There’s a lot of different kind of blood, and a lot to take into consideration. For example—how did the injury happen? How long ago was it? Is the blood still running or drying up? What part of the body is the blood coming from? There’s a bit of medical research behind creating an injury. You should decide whether you want the blood to get in your clothes, whether you want to wash it out, or whether you want it to dry or move. In general, I would say everyone needs a liquid blood, a blood that won’t dry, and a gel-texture blood that dries into a scab texture. I don’t think it’s something to use very often, but they also have this powder that is almost invisible, but once you liquify it the powder turns red—instant blood powder. Eye blood is also great for anyone into vampires, zombies, but also for anyone with drunk, tired, or injured eyes. It dyes the white part of your eye red and disappears fast.A lot of people take pride in mixing their own blood. You can DIY your own with corn syrup and food coloring. Some fake blood has a little bit of laundry detergent, which comes easier out of the clothing. But never trust it 100% unless you test it first.
Blood usually comes in three colors. If you choose one, pick medium or dark. A light color is more oxygenated and bright. On camera, vivid red looks like ketchup, so some people mix in a little bit of soy sauce to darken it.”
SKIN EFFECTS
EYEBROW PLASTIC
“A skin effects wax should be in everyone’s kit. When making special effects for a movie, you have to ask—will this be photographed? Does it have to last? Is the character underwater, or part of an action scene? Of course if it’s wax, it won’t last well If you punch it or sweat it off.You can block out the brows many ways, and how much wax you use depends on the amount of hair already on the brow. You want the hair to adhere to the skin as flat as possible. I prefer to do this with spirit gum though, because it comes out of the hair easily and it’s pretty strong. But if you need the look of skin with no hair, then fill those tiny cracks in with wax afterwards to smooth things out. Then, go over it and dab a sponge to create a texture on the skin—it's not plastic smooth. To put makeup on it, you have to seal it with a special sealer, because anything you stick onto the face you have to seal before applying makeup.”
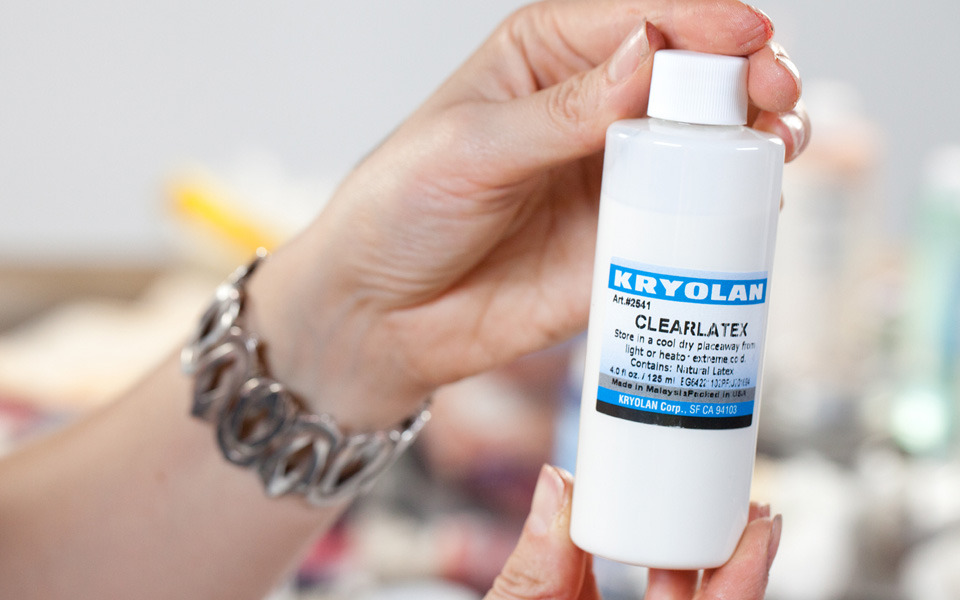
LIQUID LATEX
“Liquid latex is a must in everyone’s kit. When it’s dry, a thin layer of liquid latex looks like another layer of skin—it’s used to create the illusion of age. To use, stretch out a section of skin with your fingers and stipple some liquid latex over the surface. Keep holding the skin as you blow-dry it for a few seconds. When you let go of the skin, the liquid latex will stay in place and create that wrinkled effect. Liquid latex is tricky because it’s sticky—and if it sticks together you have to start over again."TUPLAST
“Tuplast is a funny material to work with. It’s kind of like a paste that you can sculpt and it looks like skin, but it’s thicker, like gooey plastic. You squirt it out directly to the skin and sculpt it with a spatula into a scar, a burn effect, or a little wound. Latex is a thin coat which builds up—this gets chunky, but you can smear out the edges and easily create a skin abnormality. It dries after a few minutes and starts to set.”ADHESIVES
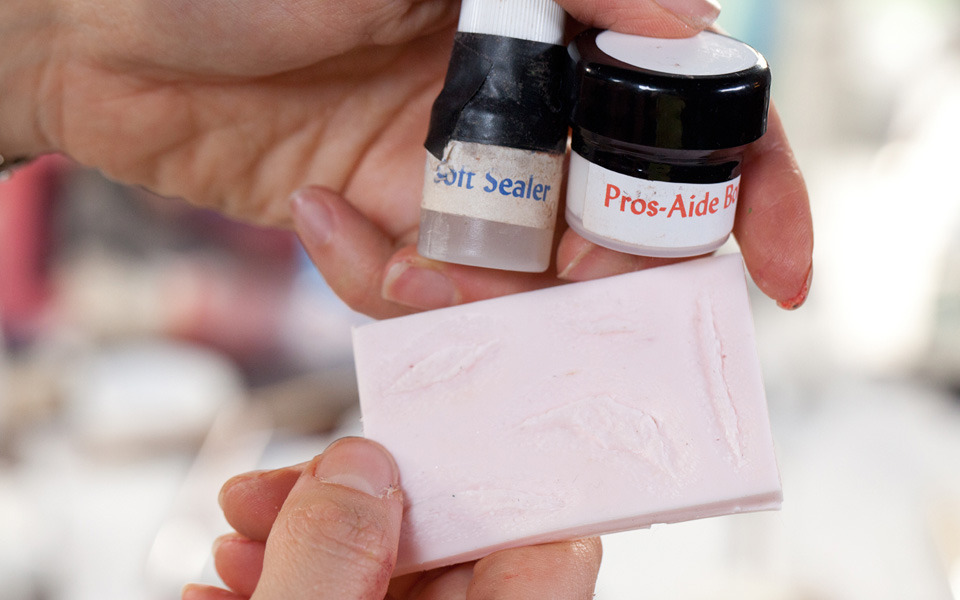
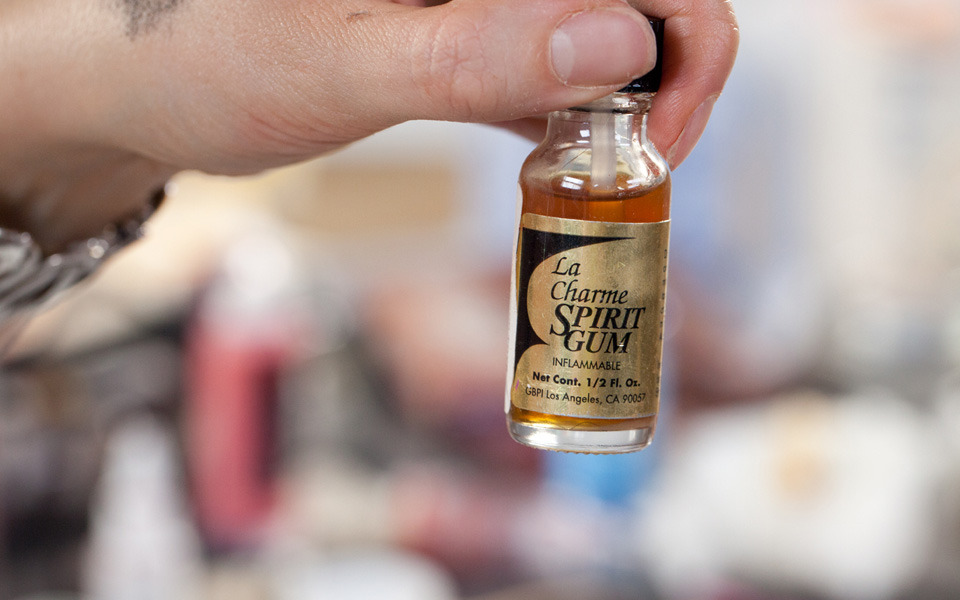
“In reality there are so many glues out there, but for a beginner two types are important to know: spirit gum, which is clear and alcohol-dissolvable, and Pros-Aide, which is an acrylic stronger than spirit gum. I absolutely can’t work without spirit gum. It dries shiny and sometimes the camera can read that, so you have to use the smallest amount possible. Pros-Aide lasts longer on the skin but it’s harder to work with because once it sticks, it sticks. It’s a contact adhesive, so you need to glue both parts, and once they touch they set. Only use a little bit at a time. It balls up like eyelash glue and can’t dissolve, so you never want to get it in the hairline or especially on the brows. Pros-Aide is stronger and better for someone who needs to do an action scene that’s sweaty with a fake nose glued on or a bald cap that you sweat under.”BRUISING
“To create a bruise, you have to know what a bruise looks like in the state you want it. If you want a bruise that’s an hour old, it’s going to change colors from more red to green, to blue, then black. You also have to think of the shape—how was the person hit? With a round ball, a hand, or on a corner? How strong is the impact? Look up real pictures of injuries and master the color. A new bruise is red, then goes to purple, blue-black, and then green to yellow. If you get a bruise, take pictures every day to use as reference.Because I work on movies and we shoot the same scene all day, you can’t have a bruise suddenly darker than before, so I use the most durable color out there. Regular makeup—cream colors and foundation—can only be use on effect that don't include latex or rubber. For those, you should use rubber mask grease paint or alcohol-based paints. It’s like a watercolor palette but activated by 99% alcohol instead. Once you put it on it stays really well and comes off with alcohol. It’s like a marker on the skin. But if you’re doing a bruise for a photo or for fun, I have great results with cream colors or powder eye shadows. If durability is not an issue, you might as well just use some purple eye shadow. You don’t want it to look too painted on, it should look like it lives underneath the skin. Make the bruising look more real by powdering with a setting powder that matches your skin tone. ”
THE LIST:
- Baby Oil
- Camouflage cream
- Cream makeup (used over sealer)
- Rubbermask grease paints (over latex or rubber)
- Duo Eyelash Adhesive
- Eyebrow plastic
- Liquid latex
- Powder eye shadows
- Makeup sealer
- Spirit gum
- Spirit gum remover
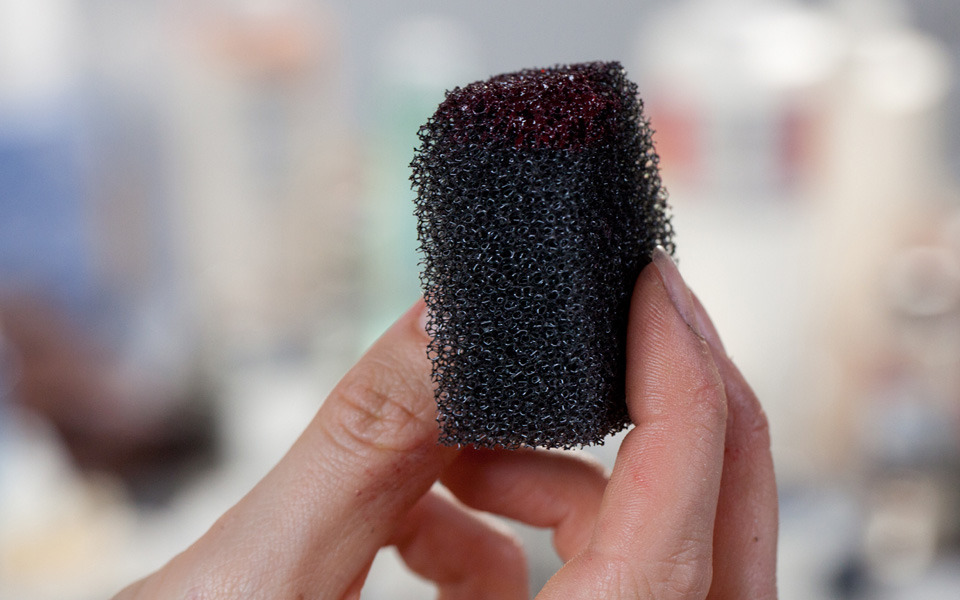
- Stipple sponge
- Rubber pore sponge (don't use your nice beauty brushes for special effects—they might get stained)
- Tools (scissors, tweezers, and a spatula)
- Different textures of blood
OPTIONAL:
- Eye blood
- Pros-aide
- Tuplast
- Dirt (DIY with cocoa powder or ground coffee beans)
No comments:
Post a Comment